Every five-day camping trip I have done used to follow the same pattern: pack a cooler with cubed ice on day one, scramble for an ice bag by day three, and throw out half a package of lunch meat on day four. The ice run itself was not the problem. The problem was that it proved I packed the cooler wrong from the start. After testing different methods on three extended trips with my family, I have a routine that holds safe food temperature for a full five days using a single load of block ice, no extra ice bags, and no camp store detours. The tool I rely on is the Coleman Classic 62-Quart Rolling Cooler. This guide walks through exactly what I do, step by step.
Before we get into the steps, a quick note on why most people fail at this. Cubed ice melts roughly twice as fast as block ice because it has far more surface area exposed to the warm air inside the cooler. A 20-pound bag of cubed ice in a moderately packed cooler is gone in 24 to 36 hours. Block ice, the same 20 pounds, can last 3 to 5 days under the right conditions. Pair that with the pre-chilling technique in Step 1 and the shade strategy in Step 5, and you can add another 12 to 18 hours of retention on top of what the ice alone gives you. That is the entire math behind this method.
Already planning your next five-day trip? The cooler you start with matters more than your ice strategy.
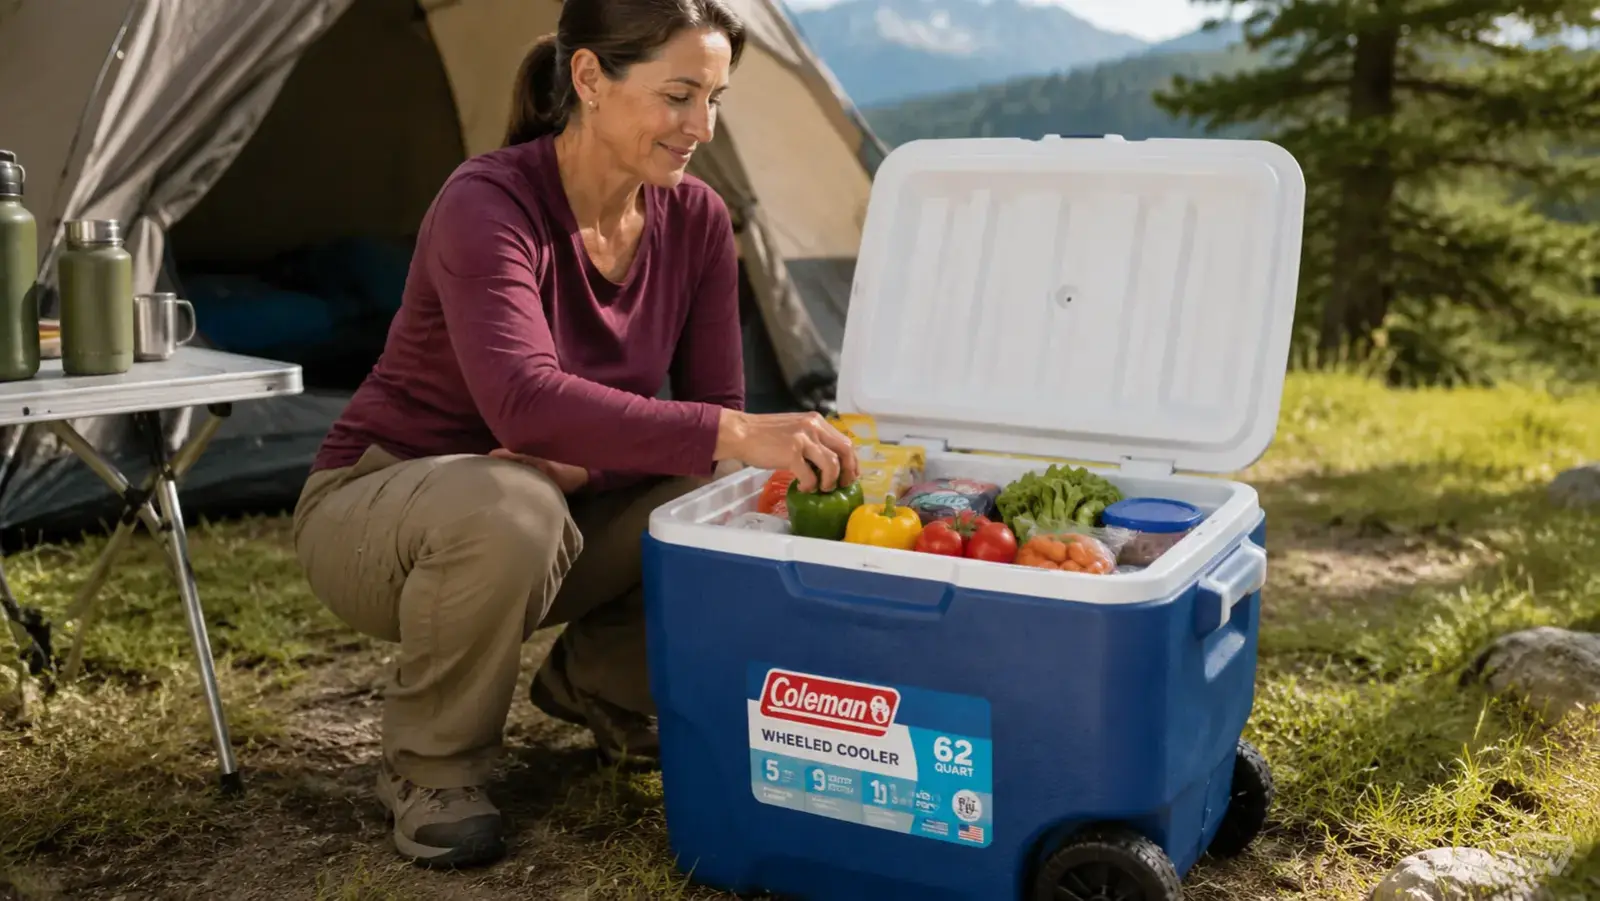
The Coleman Classic 62-Quart Rolling Cooler has a tested 5-day ice retention rating, an integrated leak-resistant drain, and wheels that actually roll on gravel. It holds enough for four people across a full week of meals with room for condiment bottles.
Amazon Check Today's Price on Amazon →Step 1: Pre-Chill the Cooler for 24 Hours Before You Pack Food
A warm cooler is a block of foam that actively fights your ice. On my first long trip, I loaded the Coleman straight from the garage where it had been sitting at about 82 degrees Fahrenheit. The first two pounds of ice went to chilling the cooler walls, not the food. Pre-chilling fixes that completely.
The night before departure, fill the cooler with one sacrificial bag of cheap cubed ice, close the lid, and leave it in the coolest part of your house or garage overnight. The next morning, dump that water, dry the inside with a towel, and pack your real load. The foam walls will already be at refrigerator temperature, 35 to 38 degrees Fahrenheit, and your block ice starts its job from a cold baseline instead of fighting room-temperature insulation. On my last trip in late July in central Georgia, ambient daytime temps hit 91 degrees. The pre-chill extended my ice life by roughly a full day compared to the same cooler packed warm.
If you do not have a spare bag of ice, fill the cooler with two-liter bottles of frozen water the night before instead. They serve the same purpose and do not leave you with a wet interior to dry before packing.
Step 2: Build Your Ice Foundation With Block Ice, Not Cubed
Block ice is the bedrock of a five-day cooler. Get two 10-pound blocks, not bags of cubed ice. Most grocery stores carry 10-pound blocks in the freezer section near the bagged ice. A convenience store WILL have cubed but may not have block, so check your grocery store the day before you leave.
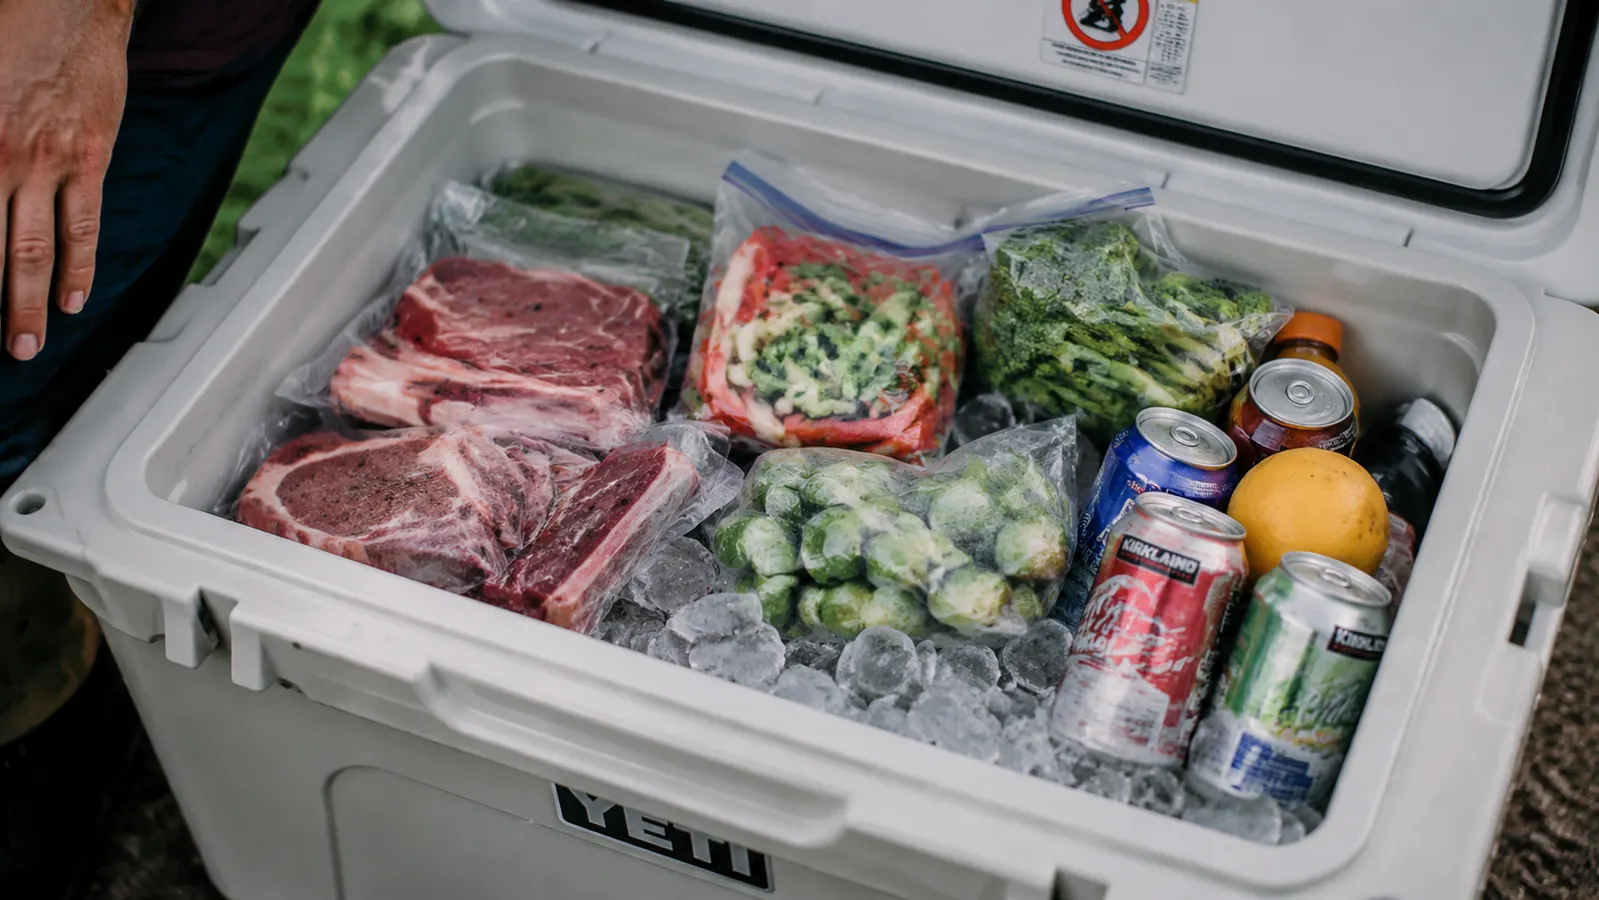
Place the blocks flat on the bottom of the Coleman cooler before any food goes in. Cover any visible floor space between the blocks with a layer of cubed ice. This creates a cold bed roughly 4 to 5 inches deep that your food containers rest on. The blocks melt slowly from the outside in, releasing cold water that chills the space below your food as the trip progresses. The cubed ice fills the air gaps the blocks cannot reach and melts faster, but by the time it is gone, the blocks are still holding temperature. I have pulled chicken out of this setup on the morning of day four at 38 degrees Fahrenheit with an instant-read thermometer.
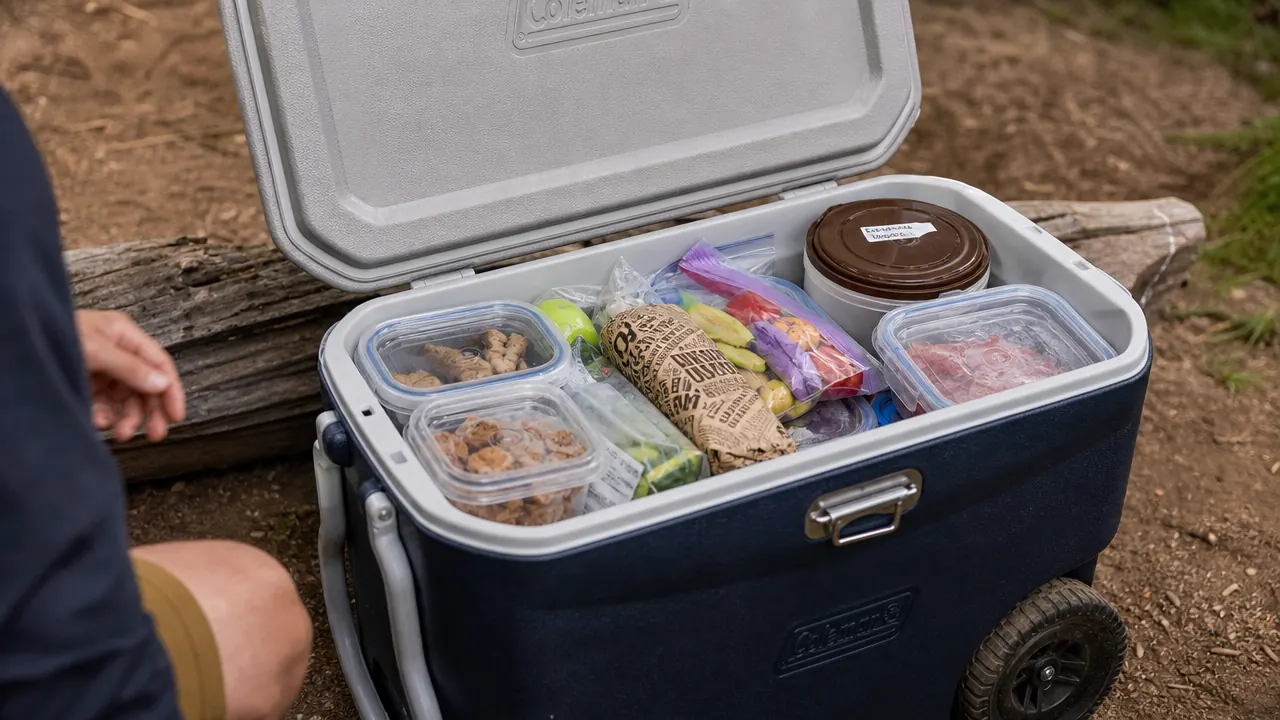
Step 3: Pack Food in a Specific Order, Sealed and Organized by Day
Every time you open a cooler, you lose cold air and add warm. The fix is to organize food so that you always know exactly where what you need is, and you can grab it without rooting around for 45 seconds with the lid open. I use a simple day-by-day system: all day-five food goes directly on top of the ice blocks at the bottom, day-four food above that, and so on up to day-one food on top. Proteins go in sealed zip-lock bags inside hard-sided containers whenever possible. A cracked egg or leaking marinade that gets into the melt water ruins the entire cooler.
Condiments, beverages, and pre-cooked items that will be consumed across multiple days go along the sides and in any open gaps. Do not leave air pockets. Empty space is the enemy of ice retention because the air inside the cooler warms faster than food or ice and pulls heat into the system every time you crack the lid. Pack it full, and if food runs out before the trip does, fill that space with frozen water bottles or extra block ice.
Every time you open a cooler lid, you trade cold air for warm. Know exactly where your food is before you lift that lid, and you will cut your open time from 45 seconds down to 10.
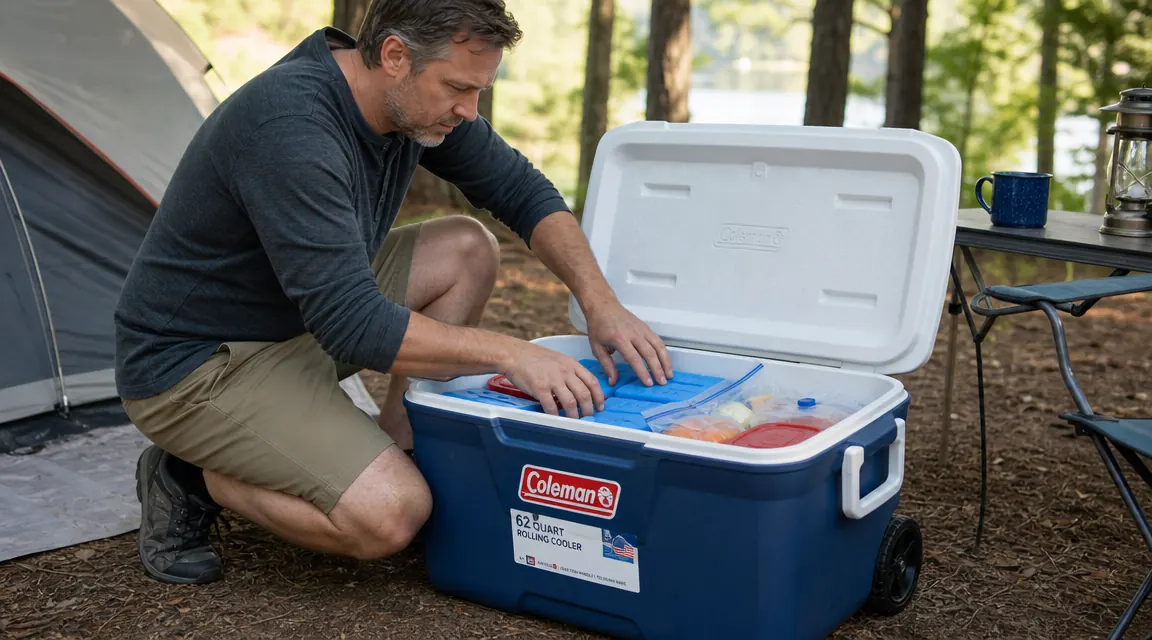
Step 4: Use a Separate Drinks Cooler If You Have One
Drinks are the cooler killers. People open the drink cooler 15 to 20 times a day, every time someone wants a water or a soda. If those drinks share space with your raw chicken and your eggs, every lid-pop lets warm air hit your food. If you have a second cooler, even a small 28-quart one, put all beverages there with cheap cubed ice. Let that cooler warm up fast and buy more ice for it whenever. Keep your main food cooler sealed except at mealtimes.
If you only have one cooler, dedicate the top 6 inches to grab-and-go items: pre-bottled water, canned drinks, snack bags. Pack a paper list on the outside of what is where inside. My family uses a dry-erase marker directly on the lid. The goal is to open the lid knowing exactly what you need, grab it in under 10 seconds, and close. The Coleman 62-quart lid seal holds a solid gasket that keeps warm air out between openings, but it cannot compensate for frequent long opens.
Step 5: Place the Cooler in Shade All Day and Insulate the Top
This step sounds obvious, but most people park the cooler at the edge of the picnic table in the sun because it is convenient. Ambient temperature matters enormously. At 70 degrees Fahrenheit outside, block ice lasts about 5 days in a quality cooler. At 90 degrees, that drops to 3 days. Every extra degree of ambient heat the cooler fights shortens your ice life.
Find the deepest natural shade at your campsite, typically the north side of a large tree or the shaded corner of a shelter, and park the cooler there permanently. Do not move it into the sun for convenience. Then drape a reflective emergency blanket or a light-colored tarp over the top and back of the cooler. This cuts direct radiant heat from reaching the lid. I have seen the surface temperature of a black plastic lid drop from 115 degrees in direct sun to 78 degrees under a $6 emergency blanket. That 37-degree reduction in surface heat translates to measurably slower ice melt.
On trips where I know temperatures will hit 90-plus, I also set the cooler on a folded tarp or a piece of wood rather than directly on hot gravel or asphalt. Ground surface temperatures can hit 140 to 150 degrees Fahrenheit in direct sun and conduct heat straight into the cooler's base. Elevating it even 2 inches makes a noticeable difference.
Step 6: Manage the Drain and Tilt to Keep Food Out of Melt Water
Melt water at 33 to 34 degrees Fahrenheit is actually a good sign: it means your cooler is still working. But food sitting in melt water accelerates spoilage even at safe temperatures, and it makes a mess. The Coleman Rolling Cooler has a drain plug at the bottom corner. Leave it closed during the trip to keep that cold water inside as a thermal mass, then drain it briefly once a day, preferably in the morning before you open the cooler for breakfast. Drain it fully only when you are ready to repack with fresh ice on a trip that goes beyond five days.
I tilt the cooler slightly toward the drain corner using a flat rock or a folded cloth so melt water flows away from the food. This keeps the bottom of my food containers dry. Meats and items that cannot get wet go inside sealed hard containers or zip-lock bags regardless, but the tilt is an easy insurance step. The drain design on the Coleman rolling model makes this simple since the plug is a large quarter-turn cap that is easy to operate with one hand, even first thing in the morning when you have just rolled out of a sleeping bag.
What Else Helps
A few additional things I have picked up across multiple long trips that did not fit neatly into the six steps above.
Freeze as much food as you can before you leave. Frozen chicken thighs, frozen burger patties, frozen corn on the cob: all of these act as supplemental ice mass in the cooler for the first two days. By the time they thaw to usable temperature, your ice load is already established and stable. Frozen proteins also eliminate the risk of cross-contamination from raw meat dripping during transport.
Avoid dry ice unless you have experience with it. Dry ice burns on contact and can create pressure buildup in a sealed cooler if the vent hole is blocked. It also freezes anything it touches directly, which ruins eggs and fresh produce. For a five-day family camping trip, block ice with the pre-chill method above is more practical and has zero handling risk.
If you buy supplemental ice on the road, buy another block, not a bag of cubed ice. Cubed ice is cheaper and easier to find, but another block added on day three will extend your run to day six or seven rather than just getting you through day four.
Keep a waterproof instant-read thermometer in the cooler. A $15 probe thermometer tells you in two seconds whether your cooler interior is at a safe 40 degrees or creeping toward 50. That data removes all guesswork about whether the lunch meat is still good. I check mine every morning before breakfast.
Freeze your proteins before you pack them. Frozen chicken is not just safer on the drive in, it is 10 pounds of extra ice mass you are already paying for.
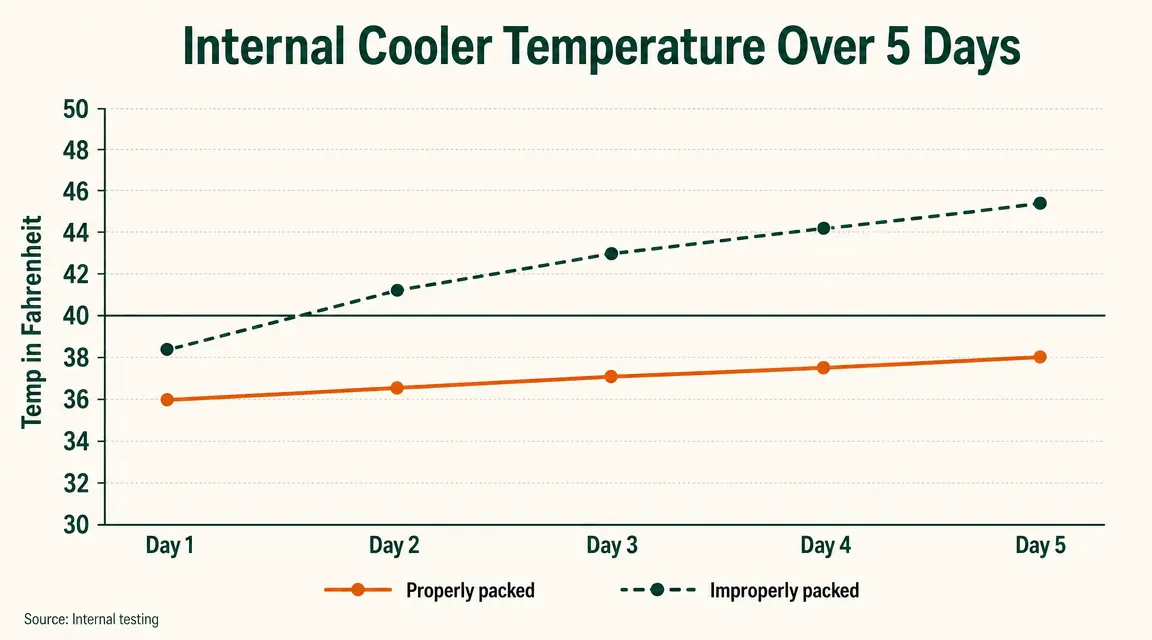
The chart above shows what I have measured across trips: a properly packed block-ice cooler holds below 40 degrees Fahrenheit for four full days before climbing. A cubed-ice-only cooler crosses the 50-degree mark by day three. That gap is the difference between a successful five-day trip and a food-safety problem on day four.
The cooler you pack this method into has to hold the seal and keep the cold in. Cheap coolers with poor gaskets undo every step above.
The Coleman Classic Rolling Cooler is rated for 5 days of ice retention, has 62 quarts of insulated space for a family of four, and rolls on all-terrain wheels that handle gravel campsites without tipping. It is the cooler I have used for every extended trip in this guide.
Amazon Check Today's Price on Amazon →